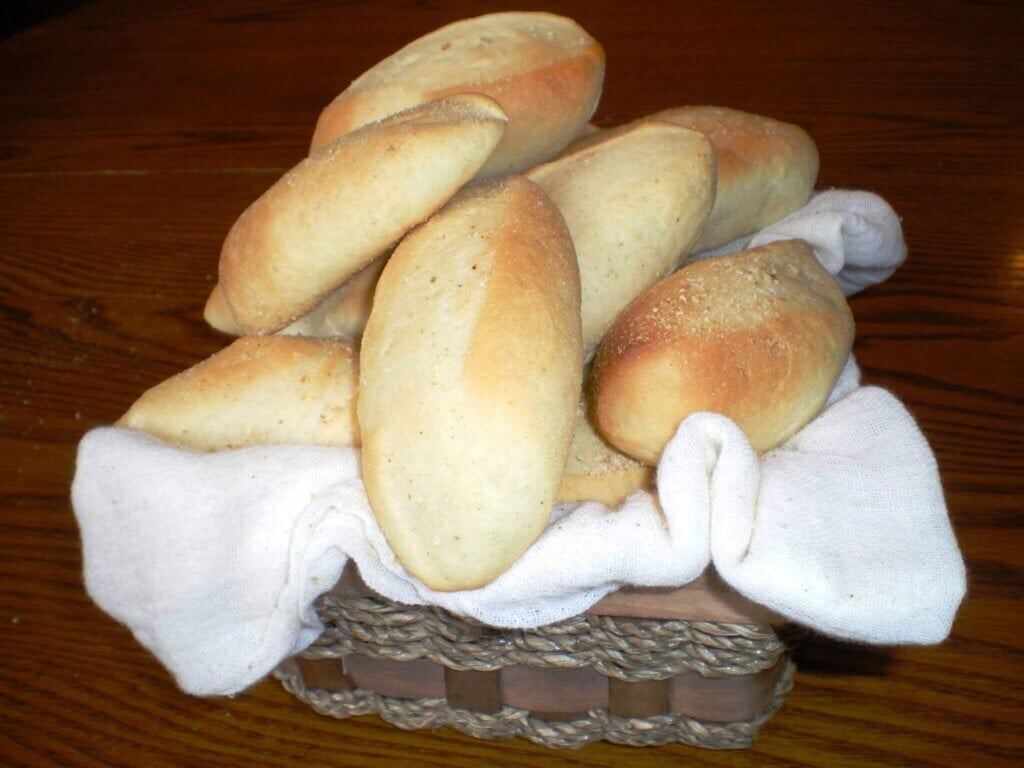
Loaf of White Bread


0 comments
Homemade bread is not only tasty, but it's also easy to make and thrifty. This recipe does not require a bread machine or mixer (although the mixer is recommended).

Edit Ingredients

  • 1/4 cup milk
  • 5 teaspoons sugar (or 1 1/2 tablespoons)
  • 1 teaspoons salt
  • 5 teaspoons butter (or 1 1/2 tablespoons)
  • 1 package active dry yeast, or 2 1/4 teaspoons bulk yeast
  • 2 1/2 to 3 1/2 cups flour, bread flour is best but all-purpose or unbleached flour will work too
  • Corn starch or nonstick cooking spray (just to prevent the bread from sticking to the bowl or pan)


Edit Steps

  1. 1
    Spray loaf pan with nonstick cooking spray.

    A Passion for Spanish Ham

    Discover everything about Spanish Ham: Recipes, Tapas, Stores, Routes
    www.foodsfromspain.com
  2. 2
    Preheat a small bowl with hot water. Dump the water out.
  3. 3
    Add the yeast.
  4. 4
    Add about 1 cup warm water (105 to 110 degrees F or 38º C) to the yeast.
  5.  
  6. Add about 1 cup warm water (105 to 110 degrees F or 38º C) to the yeast.
     
    Add about 1 cup warm water (105 to 110 degrees F or 38º C) to the yeast.
  7. 5
    Proof until bubbly. This should take about 10 minutes. The yeast will smell yeasty and look foamy when ready-to-use.
  8. 6
    Add the yeast to a large mixing bowl.
  9. 7
    Melt the butter and add to the milk, sugar and salt to the yeast mixture.
  10. 8
    Add 2 cups flour and stir well
  11. Add 2 cups flour and stir well.
    Add 2 cups flour and stir well.
  12. 9
    Add remaining flour, 1/4 cup at-a-time, until the dough is slightly sticky. The dough will start to leave the sides of the bowl.
    Add remaining flour, 1/4 cup at-a-time, until the dough is slightly sticky.
    Add remaining flour, 1/4 cup at-a-time, until the dough is slightly sticky.
  13. 10
    Turn the dough out onto a lightly floured surface.
    Turn the dough out onto a lightly floured surface.
    Turn the dough out onto a lightly floured surface.
  14. 11
    Knead for 10 minutes by hand. To knead by hand, place the heel of the palm and press the bread dough, turn 1/4 turn, repeat. See How to Knead Dough.
  15. 12
    Shape dough into a ball.
    Shape dough into a ball.
    Shape dough into a ball.
  16. 13
    Spray a clean mixing bowl with nonstick cooking spray.
  17. 14
    Add the ball of dough to the mixing bowl. Turn to coat with nonstick cooking spray.
  18. 15
    Cover with the tea towel.
    Cover with the tea towel.
    Cover with the tea towel.
  19. 16
    Let rise until double, about 1 to 1 1/2 hours.
    Let rise until double, about 1 to 1 1/2 hours.
    Let rise until double, about 1 to 1 1/2 hours.
  20. 17
    Remove dough from bowl.
  21. 18
    Roll out using a rolling pin.
    Roll out using a rolling pin.
    Roll out using a rolling pin.
  22. 19
    Shape into a loaf.
  23. 20
    Place in loaf pan.
    Place in loaf pan.
    Place in loaf pan.
  24. 21
    Let rise until almost double, about 1 hour.
    Let rise until almost double, about 1 hour.
    Let rise until almost double, about 1 hour.
  25. 22
    Bake at 400º F or 200º C for about 30 minutes.
  26. 23
    Turn out bread and let cool.


Tips

  • Use yeast in bulk. This will help save money when baking. Bulk yeast can be found at grocery warehouses or ordered online. SAF yeast makes excellent bread.
  • You may want to add a pinch of sugar to the yeast water mixture to help proof the yeast.
  • Spray your hands with nonstick cooking spray to help keep the dough from sticking.
  • Try to keep the dough as soft as possible. This will help make a soft loaf of bread.
  • For a softer crust, brush cooled melted butter on the freshly baked bread crust.

Things You'll Need

  • Mixing bowls
  • Measuring cups and spoons
  • Rolling pin
  • Loaf pan
  • Kitchen tea towel
  • Wire baking rack

Pandesal


0 comments
Pandesal or The Bread of Salt (which is also the title of a popular short story written by NVM Gonzales) is probably the most popular bread in the Philippines. This bread is the favorite “agahan” (breakfast food) of most Pinoys (slang for Filipino) and can be eaten plain or with “palaman” (filling).In the Philippines, all bake shops and bakeries sell Pandesal. Sometimes, this is sold in rolling stores(usually a honking bicycle with a big box on the back). When purchasing from a neighborhood bakery, be sure to be there before 8 am because the supply runs out after that time.

Just so you know, I love eating Pandesal after dipping it in hot coffee :) .


Pandesal

Recipe: Pandesal

Ingredients

  • 2 cups all purpose flour
  • 2 cups bread flour
  • 1/2 cup white sugar
  • 5 tbsp butter, melted
  • 1 tsp baking powder
  • 1 1/4 cup fresh milk, warm
  • 1 pouch rapid rise yeast
  • 1 tsp salt
  • 1 cup bread crumbs
  • 1 piece raw egg
  • 1 tbsp cooking oil

Watch the cooking video:


Cooking Procedure

  1. Combine the yeast, sugar, and warm milk and stir until the yeast and sugar are fully disolved
  2. In the mixing bowl, combine the dry ingrdients starting with the flour then the sugar, salt, and baking powder . Mix well by stirring
  3. Add the egg, butter, cooking oil, and yeast-sugar-milk mixture in the mixing bowl with the dry ingredients then mix again until a dough is formed. Use your clean hands to effectively mix the ingredients.
  4. In a flat surface, knead the dough until the texture becomes fine.
  5. Mold the dough until shape becomes round then put back in the mixing bowl. Cover the mixing bowl with damp cloth and let the dough rise for at least 1 hour
  6. Put the dough back to the flat surface and divide into 4 equal parts using a dough slicer
  7. Roll each part until it forms a cylindrical shape
  8. Slice the cylindrical dough diagonally (These slices will be the individual pieces of the pandesal)
  9. Roll the sliced dough over the breadcrumbs and place in a baking tray with wax paper (makes sure to provide gaps between doughs as this will rise later on)
  10. Leave the sliced dough with breadcrumbs in the tray for another 10 to 15 minutes to rise
  11. Pre heat the oven at 375 degrees fahrenheit for 10 minutes
  12. Put the tray with dough in the oven and bake for 15 minutes
  13. Turn off the oven and remove the freshly baked pandesal.
  14. Serve hot. Share and enjoy!

Super Easy Bread for Beginners


0 comments
This is the easiest one-loaf yeast bread you will ever bake. The Super Easy Bread for Beginners recipe produces a soft crust and a moist center using the most basic ingredients that can be found in most kitchens.

Prep Time: 3 hours

Cook Time: 45 minutes

Total Time: 3 hours, 45 minutes

Ingredients:

  • 3/4 cup warm water
  • 1 package active dry yeast
  • 1 tsp salt
  • 1-1/2 tbsp sugar
  • 1 tbsp vegetable shortening
  • 1/2 cup milk
  • 3 cups all-purpose flour, approximately

Preparation:

  1. In large bowl, add the warm water. Slowly stir in dry yeast. Continue to stir until yeast is dissolved.

  2. Add salt, sugar, shortening, and milk to bowl. Stir.

  3. Mix in the first 2 cups of flour.

  4. If needed, begin adding more flour, one tablespoon at a time, until the dough chases the spoon around the bowl.

  5. You do not need to use up all the flour called for in this recipe, or you may need more flour than called for. The amounts vary depending on many factors, including weather, which is why most bread recipes only give an approximate amount of flour needed.

  6. Turn dough out onto floured board and knead, adding small spoonfuls of flour as needed, until the dough is soft and smooth, not sticky to the touch.

  7. Put dough in buttered bowl, turn dough over so that the top of dough is greased. Cover and let rise in warm spot for 1 hour.

  8. Punch down dough. Turn out onto floured board and knead.

  9. Preheat oven at 375 degrees F.

  10. Form dough into loaf and set in buttered bread pan. Cover and let rise for about 30 minutes.

  11. Score dough by cutting three slashes across the top with a sharp knife. Put in oven and bake for about 45 minutes or until golden brown.

  12. Turn out bread and let cool on a rack or clean dishtowel.

Pan de Coco


0 comments
Yesterday my Filipina friends and I were scheduled (or so I thought) to have a lunchdate at the house of another Filipina, but we decided to meet here at my home before going there. I was the first person called by that hostess, and I was tasked to inform the others about it.

So we went...and our hostess Vengie (in blue shirt, sandwiched by me in yellow and Fe in red) was pleasantly surprised to see us because we were supposed to meet NEXT WEDNESDAY...Ooops! Sorry! (blush!) Though surprised, since she was not able to attend our picnic last August at Ana's (in blue tank top) tabing-ilog, she was pleased nonetheless, although apologetic that she did not cook anything. No problem, because I bought a pan (last batch) of savory chicken feet, some palitaw (which she missed that day I made them the first time), and some pan de coco (one for each of us). Fe brought Alaskan salmon (caught by her husband), and Daisy (the one who holds a baby) brought veggies, rice and fried fish, which we ate with tomato-soy sauce dip. Ana was exempted because of her two babies to take care of.

Anyway, I was not planning to make pan de coco. The night before, I was debating on which one to prepare: palitaw or pan de coco. I thought palitaw was easier to make, so I made those, about 15 pieces, but had excess coconut (about 7 heaping tablespoons), so I ended up planning to bake them the next morning (Wednesday). I used the Parker House Rolls recipe (same dough I use for siopao) was able to make only 9 pieces, and I left the rest of the dough plain. Fe came to my house first, so I offered it, with a warning to have only one ("Tig-iisa lang kayo!"). When she finished it, she was looking longingly at the rest. "Bitin ba?" (Do you want more?) "Bakit kasi konti lang ginawa mo?" (Why did you make only a few?) You know the story...Hehe...


Here's how:


INGREDIENTS:

Prepared dough (any sweet bread recipe; I used same dough as in siopao, but I have also tried Buttery Sweet Bread recipe using bread machine)
grated coconut (either bought frozen, or grate your own; see my palitaw post in old kusina)
white or light brown sugar (Note: I had about 2-1/2 cups of mixed coconut-sugar, proportion of 1 part coconut:2 parts sugar)


Buttery Sweet Bread recipe (dough cycle only; I used 1-1/2lb loaf to make 21 pcs)-

1/2 cup milk
1/3 cup water
1 large egg
1/4 cup butter or margarine, cut up
1 tsp salt
3-1/3 cup bread flour
1/4 cup sugar
2 tsp BM yeast

To prepare Buttery Sweet Bread dough:
Warm all liquid ingredients to room temp (80-100 deg F) and place in BM pan. Then place all dry ingredients. Run on dough cycle (about 1.5 hrs or 1&1/2 hrs or total of 90 minutes).


INSTRUCTIONS:

The night before you serve, mix grated coconut with granulated sugar (white or light brown), 1:2 ratio (i.e., I had 7 heaping tbsp of grated coconut which I mixed with 14 exact tbsp (not heaping) of sugar (you may want to taste first then adjust; really , it is up to you). Let this sit in a covered container in the fridge, so that it draws out moisture from the coconut and creates a wonderful caramel-y coconut-y taste. If you plan to bake right away, at least prepare this before your dough so it will sit for sometime before baking. Also, prepare the dough (you may want to use Parker House Rolls; see my beef asado siopao post) and leave it in the fridge overnight. You may also use the Buttery Sweet Bread recipe as above on the day you are going to bake.

Pinch off dough about size of pingpong balls and place on greased baking sheet to let rise for about 10 minutes, covered with greased plastic.

Proceed with filling the buns the same way you would the siopao. Place on parchment paper-lined baking pan. FLATTEN a bit. See slide show.

Allow the filled buns to rise for 30 minutes, in a warm place free of draft (on top of a flat stove covered with damp flour sack or greased cling wrap, or inside a warm oven).

Bake in 400 deg F for 12-15 minutes (it browns quickly). Brush with softened butter as soon as they come out. Let cool about 1-2 minutes before eating, or about 10 minutes those you will not consume right away, then transfer to wire rack to cool completely before storing in ziploc bags.


When I removed these from the oven, some of the coco-caramel oozed out of the buns and made a somewhat chewy caramel film on the paper, which I detached and savored. Yum!

Vengie, the hostess, asked me to bring pan de coco next week (the real schedule), as she has some Filipino friends who will be coming over from NY. Oh, and she requested to have some yeast rolls baking session with me in the near future (I feel flattered and honored!). She loves baking muffins and cakes, but does not know how to deal with yeast rolls. I love yeast rolls, because I grew up with such (typical ordinary) bakery goodies in PI. Back then, cakes and muffins were more expensive and bought only from SM or some specialty bakeshops, and what I had for ordinary snacks were mostly yeast rolls and breads, in the likes of pan de sal, pan de coco, monay, patigas, "tasty" (American pan bread), spanish bread, ensaymada, pan de regla (we at my father's bakery called them "pula"), etc., and I was lucky to have had any of these fresh and hot out of the oven before they even made it to the display area of our store. Now, I am getting more and more comfortable baking them, and loving the nostalgic trip as I knead and shape the dough. My husband happens to love yeast rolls as well, so although it is quite laborious and more time-consuming than muffins and cakes, I do enjoy making them.
 

Spanish Bread


0 comments
I managed to take photos the last time I made spanish bread, so here goes the step-by-step how-to's. For some reason, my computers (both PC with Windows XP and laptop with Linux) do not currently work well with slide.com. I have not had the gumption to make a new account with Flickr to attempt making slide shows, so I resorted to posting a series of photos here instead.

This is another kid-favorite rolls, they like these more than they do ensaymada, although I made both using the same dough (see my posts on Ensaymada).

(Update on 3/17/2012: I also brought several pieces to work and all my co-workers at the time liked these spanish breads/rolls. Well, the non-diabetics and those not gluten-sensitive ones, that is.)

RECIPE: I used the BM ensaymada recipe for the dough. If you have a bread machine, make sure you use the recipe that your BM bucket can accommodate.  Check your BM manual for instructions. Mine says to place room temp liquid ingredients first then the dry ingredients, then run on dough cycle. Once the dough cycle is over, proceed to the instructions below for making the spanish bread.


Ingredients (3-lb dough):
1 cup milk
3/4 cup water
1 egg
4 egg yolks
1/2 cup (1 stick) butter
2 tsp salt
6-3/4 cups bread flour (plus some more; see note above)
3/4 cup sugar
2 tsp BM yeast

(2-lb dough) - [This yielded 9 ensaymadas and 12 pcs spanish bread]
2/3 c milk
1/2 c water
1 egg
2 egg yolks
6 tbsp butter
1-1/2 tsp salt
4-1/2 c bread flour
1/2 c sugar
1-1/2 tsp BM yeast

For the filling of butter-sugar mixture: 1 stick of softened butter (1/2 lb) + 1 cup white sugar. Adding 1/4 cup breadcrumbs to this mixture somehow aids in keeping them inside the rolls and minimizing the oozing when they melt. Some also prefer brown sugar.


Instructions:

Prepare the dough. Divide into portions the size of a golf ball. Mix sugar (your choice: brown or white. I prefer white.) and softened butter/margarine (I can't specify the proportions because I approximated. I just kept adding sugar and mixing until I got a consistency that was gritty yet spreadable.)


Flatten each piece
Flatten each piece with a rolling pin as shown. Go ahead, don't be afraid...Start from the middle outward up and down, especially adding pressure at the ends so they stick to the table/countertop. That way, they don't roll back or spring up.

Spread filling
Spread a good layer of sugar-butter mixture. Avoid the ends so you can seal properly.

Roll tightly
Roll tightly. Make sure end seals.

Coat with bread crumbs
Roll in breadcrumbs to coat.

Place on baking pain SEAM side DOWN
Place on baking pans with seam side down. (Note: Either you grease your pan with a thick coat of shortening or better yet, use parchment paper.)  Cover with plastic (to avoid drying up). Let rise for 15-30 minutes (depending on what yeast you used and the humidity/temperature of environment). Alternatively, you can place the pan uncovered inside the oven which is warmed up for one minute.

Bake at 350 deg F for 12-15 minutes or until golden brown.  (If you have too much for one-time serving and want to reheat these in the future, bake only for about 10 minutes initially, so when you reheat they won't look burnt. I reheat 2-3 pieces for merienda in an oven toaster at 350 deg F for about 3 minutes or so.).

(If you want them really mestisahin, bake at 325ºF for 15 minutes.)

You may want to let these stay on the pan so that their bottoms soak up the melted caramel until the caramel solidifies into sort of candy. Then transfer to the cooling rack to cool completely before you store in ziploc bags.

STORING:

When you cannot eat all freshly baked spanish bread, after cooling in the wire rack for about 30 minutes, they should be warm (not hot) or almost room temp. That is the perfect timing to place them in ziploc bags and close. Observe after several minutes if they sweat. If they do, open the bag and let the excess moisture evaporate some more, wipe the sweat inside the bag with paper towel. Whey they do not sweat anymore, close bag tightly. When done at the right timing, your spanish bread will remain soft for 3 days without having to reheat them. But then, I myself prefer heating them up in oven toaster for about 3 minutes. And these do not last more than 3 days (or even a day!) for my family.

Ensaymada


0 comments
Ensaymada is a Filipino sweet pastry. This is said to be a variation of the Ensaimades, a similar bread that uses pork lard as an ingredient that originated in Majorca (the largest island of Spain).

In the Philippines, this pastry is available in any neighborhood bakery and the well know bakeshop chains as well.  This is one of my favorite mid-afternoon snack and I usually have it with brewed coffee.


Ingredients:

5 cups all-purpose flour
¾ cup butter, melted
¾ cup white sugar
1 tsp salt
1 cup grated cheddar cheese
3 pieces raw eggs
1 pouch rapid rise yeast (about 2 ¼ tsp)
1 cup fresh milk, warm


Cooking procedure:

1. Combine warm milk, yeast, and ½ cup sugar and stir until yeast and sugar dissolves in milk. Set aside to let yeast activate (approximately 10 minutes)
2. In a mixing bowl, combine all the dry ingredients starting from the flour, sugar, and salt then mix thoroughly.
3. Add the eggs, 1/2  cup butter, and activated yeast mixture (these are the ingredients that we combined in number 1) to the mixed dry ingredients. Mix thoroughly until all ingredients are evenly distributed and a dough is formed.
4. Knead the dough until texture becomes fine.
5. Put the dough back on the mixing bowl and cover the top with cloth. Allow the dough to rise for 2 hours.
6. Put the dough on a flat surface and flatten. Punch the dough lightly to release the air inside.
7. Using a dough slicer, divide the dough into four pieces.
8. Roll each piece until shape becomes cylindrical.
9. Cut the cylindrical dough into individual serving pieces (1 serving piece should weigh at least 80 grams).
10. Put the sliced individual serving piece in a flat surface and flatten using a rolling pin.
11. Combine ¼ cup melted butter with ¼ cup white sugar. Using a brush, paint the mixture on the flattened dough. Make sure to paint only the center part of the flat dough.
12. Sprinkle some cheese over the painted area then seal the dough by folding opposite directions and rolling it until a long cylindrical shape is formed (about 14 inches in length).
13. Start forming the spiral Ensaymada shape by crossing the two opposite ends of the dough. The first end should be placed under dough while the other end should be inserted in the middle. (see video for better comprehension)
14. Place the dough in a baking tray with wax paper and cover with cloth. Set aside to rise for another 45 minutes
15. Pre-heat the oven at 350 degrees Fahrenheit for 10 minutes. Remove cloth on top of the tray and bake the dough for 15 minutes at 350 degrees Fahrenheit.
16. Remove the baked Ensaymada from the oven. Using the remaining melted butter and sugar mixture, paint the top of the baked ensaymada and sprinkle additional cheese.
17. Serve hot. Share and Enjoy!

Espasol


2 comments
Espasol is a Filipino sweet that is sold on the streets and is a local favourite.  It is a sweet made of rice flour cooked in coconut milk.  As with most sweets there are several ways of making Espasol.  I added pinipig for extra rice flavour.  I also added grated young coconut meat to give it another texture.
My Mum and I have dedicated Fridays to our cooking and baking adventures.  I love cooking with my mum as she has the same love for cooking as I do.  I supposed that’s who I get my passion from.  But most of all, I love to learn from her.  

We have been wanting to make Espasol for a long time.  It’s one of my all time favourite Filipino sweets.  We have been given some while holidaying in Philippines and I devour them very quickly.  We are, therefore, so happy to find out that this sweet is so easy to make.  We plan on making this again very soon.


3 cups of ground rice flour, toasted in a dry pan. Set aside and cool


Rice Flakes (Pinipig)


Toast the pinipig in dry pan then ground finely
In a bowl, mix together the rice flour and the pinipig.  Dust a clean surface (bench or baking sheet) with 1/2 cup of the mixture and reserve another 1/2 cup for rolling out the espasol.


Fresh young coconut


Young coconut split in half.  Reserve the juice.


Grate the coconut meat


In large pan mix together, 800ml coconut milk, coconut juice, 11/4cup sugar and 1/2tsp salt.  Bring to the boil then lower the heat and simmer for 5 minutes.  Stir in 1 tbls vanilla extract.  


Add the rice flour and pinipig mixture and stir continuously until it is very thick and fairly dry for about 5 minutes


Spread out the mixture over the prepared surface.  Flatten and smooth with a flat spatula and let cool.

.

When cooled you can now shape the mixture into whatever shape you like.  You can shape them into balls, triangles or logs, like I do.  Dust your hands with the flour mixture as the batter is quite sticky.   Dust the espasol with the remaining flour mixture to keep them from sticking together.

Serve Immediately or can be refrigerated for up to 3 days.

newer post older post